
Camera: Aperture and Shutter
One of the most important things to consider when taking a photograph is exposure . A photo that is too light or, conversely, dark and dark (unless it has not been deliberately made with creative flair) is an image penalized by a defect in exposure.
A photograph is said to be correctly exposed when it faithfully reproduces the same amount of light that our eye sees.
When the photograph is too light, it is said to be overexposed , conversely, when it is too dark, it is said to be underexposed . But what does the exhibition have to do with it now?
There are 3 fundamental factors that influence the correct exposure of a photograph and they are:
- ISO sensitivity
- Diaphragm
- Shutter
In our fifth lesson we will focus only on how the diaphragm and the shutter work.
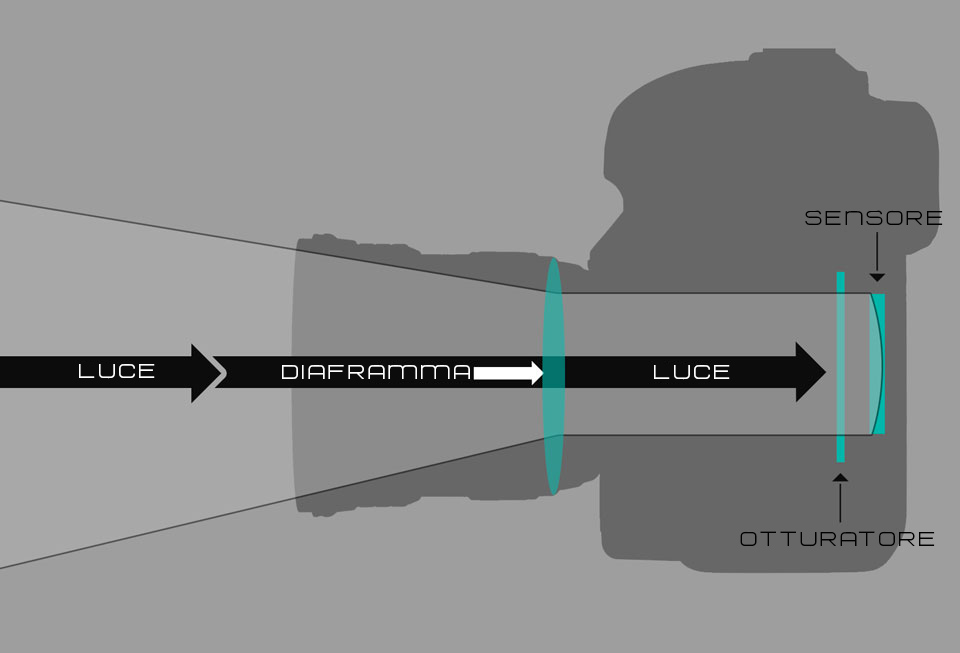
Before arriving at the sensor and storing the image, the light passes through the objective lens, arrives at the diaphragm , continues its travel and finally passes through the shutter . Now you understand why, diaphragm and shutter, being devices that let more or less light through, are essential for the correct exposure and the success of a photograph. So let's see them one at a time and you will understand how closely they are linked to each other.
The diaphragm
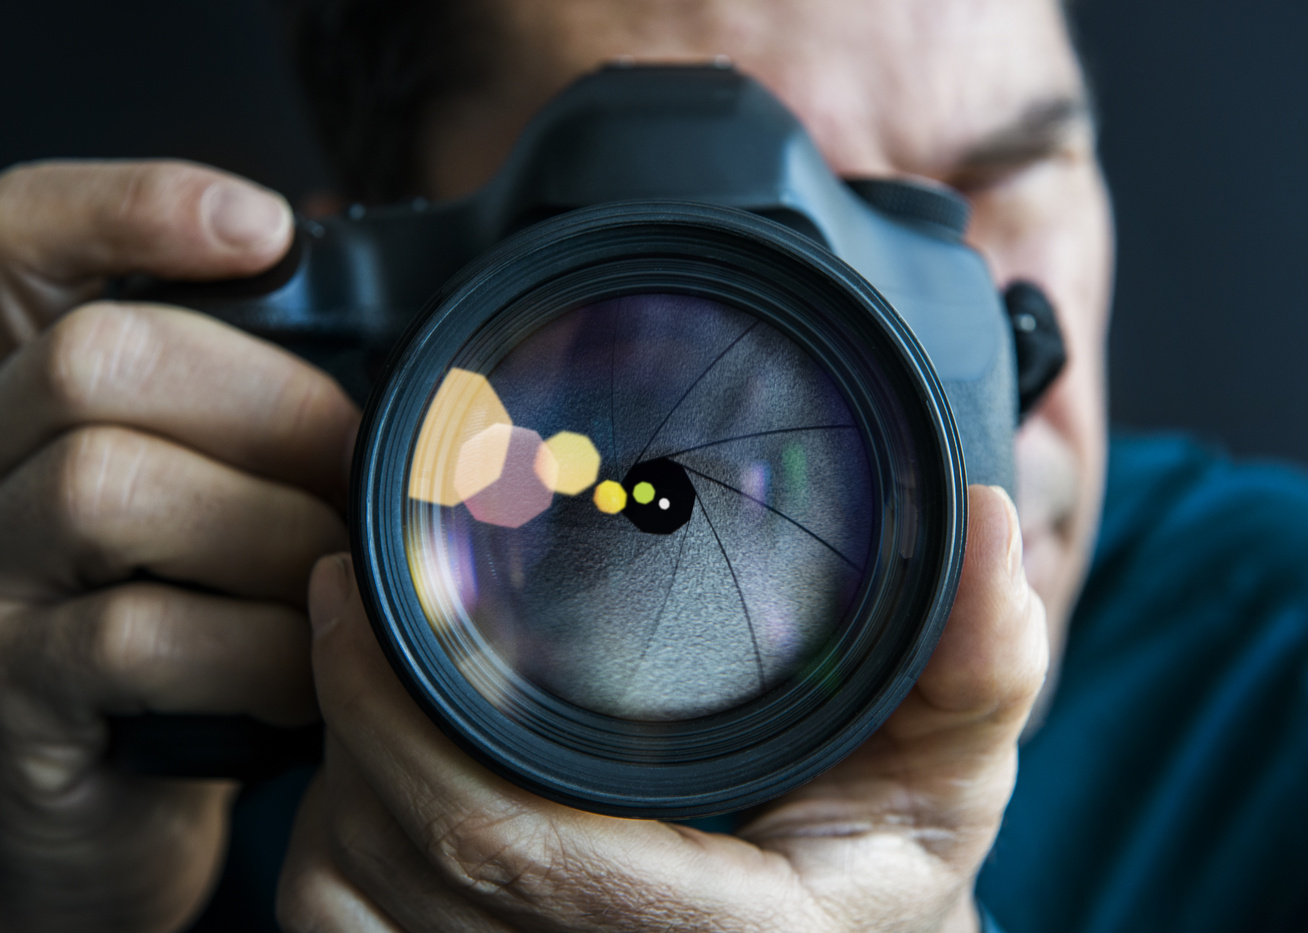
How many times have you wondered why the aperture is so fundamental in photography? How many times have you confused it for a muscle that separates the thoracic cavity from the abdominal cavity? Since we are not on "learning the human body", today we will talk about the aperture in photography, which is essential for the passage of light to the sensor. Let's see what it is and how it works.
If you are approaching photography and don't know which way to go or if you have just taken possession of a camera with manual settings (you bought it or it was given to you) and in any case you are stuck at the first point, this guide will be pure gold for you who are at the beginning. Of course, that doesn't mean a pro doesn't need a brush up on the basics. Therefore, where do you start in photography? Definitely from the exposure triangle, which in fact does not take into account the camera model but the type of use that the photographer will make of it. The three elements of the exposure triangle, as mentioned, are exposure time (shutter), ISO sensitivity and aperture.
The diaphragm, in photography, is a mechanism, with a circular shape, placed halfway between the front and rear lenses of a photographic lens . This circular aperture is delimited by some metal blades, the so-called "diaphragm blades", which you will find in the technical specifications of each photographic lens.
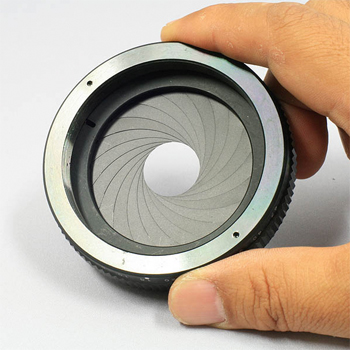
The diameter of this opening can increase or decrease in order to let a greater or lesser amount of light enter the sensor, this means that it is possible to decide, together with the exposure time and the ISO sensitivity, the global exposure of the shot, the blur (therefore the depth of field) and so on.
Try to imagine the diaphragm as if it were your eye: take an object, then bring it closer and further away, staring at it. Have you noticed that the closer the object is, the more naturally blurred the background is? The diaphragm behaves the same way. But now stop doing it, otherwise, as grandma says, your eyes will get ruined.
Similarly, if you need another very realistic example, try turning off the light in the room in the evening: at first you will see almost nothing, then gradually you will start to see something. Of course, it's not that if you keep your eyes open it will magically become day (metaphor of long exposure), but in fact you will see something more and your eye will get used to it. A very similar concept applies to photography, with aperture, exposure time and ISO sensitivity. If you think about it, it's nothing more than translating what we've always been used to doing into a language that can be understood by the electronic device we're using (the camera).
The natural diaphragms
So far so easy, right? There are the slats, the mechanism, it opens and closes, it seems like child's play. I don't know about you, but my school life was great as long as it was about writing essays and learning languages, then came math, which first confused me with numbers, then destroyed me with the introduction of strange letters and symbols. The truth is that I've never been a genius in mathematics and the fact of seeing various numbers and formulas even in photography, at least initially, scared me a lot. So if you think like me, know that if I did it, anyone can do it.
Having defined what a diaphragm is in photography, we need to understand how they differ, what those letters and numbers are, what the difference is between one value and another and so on.
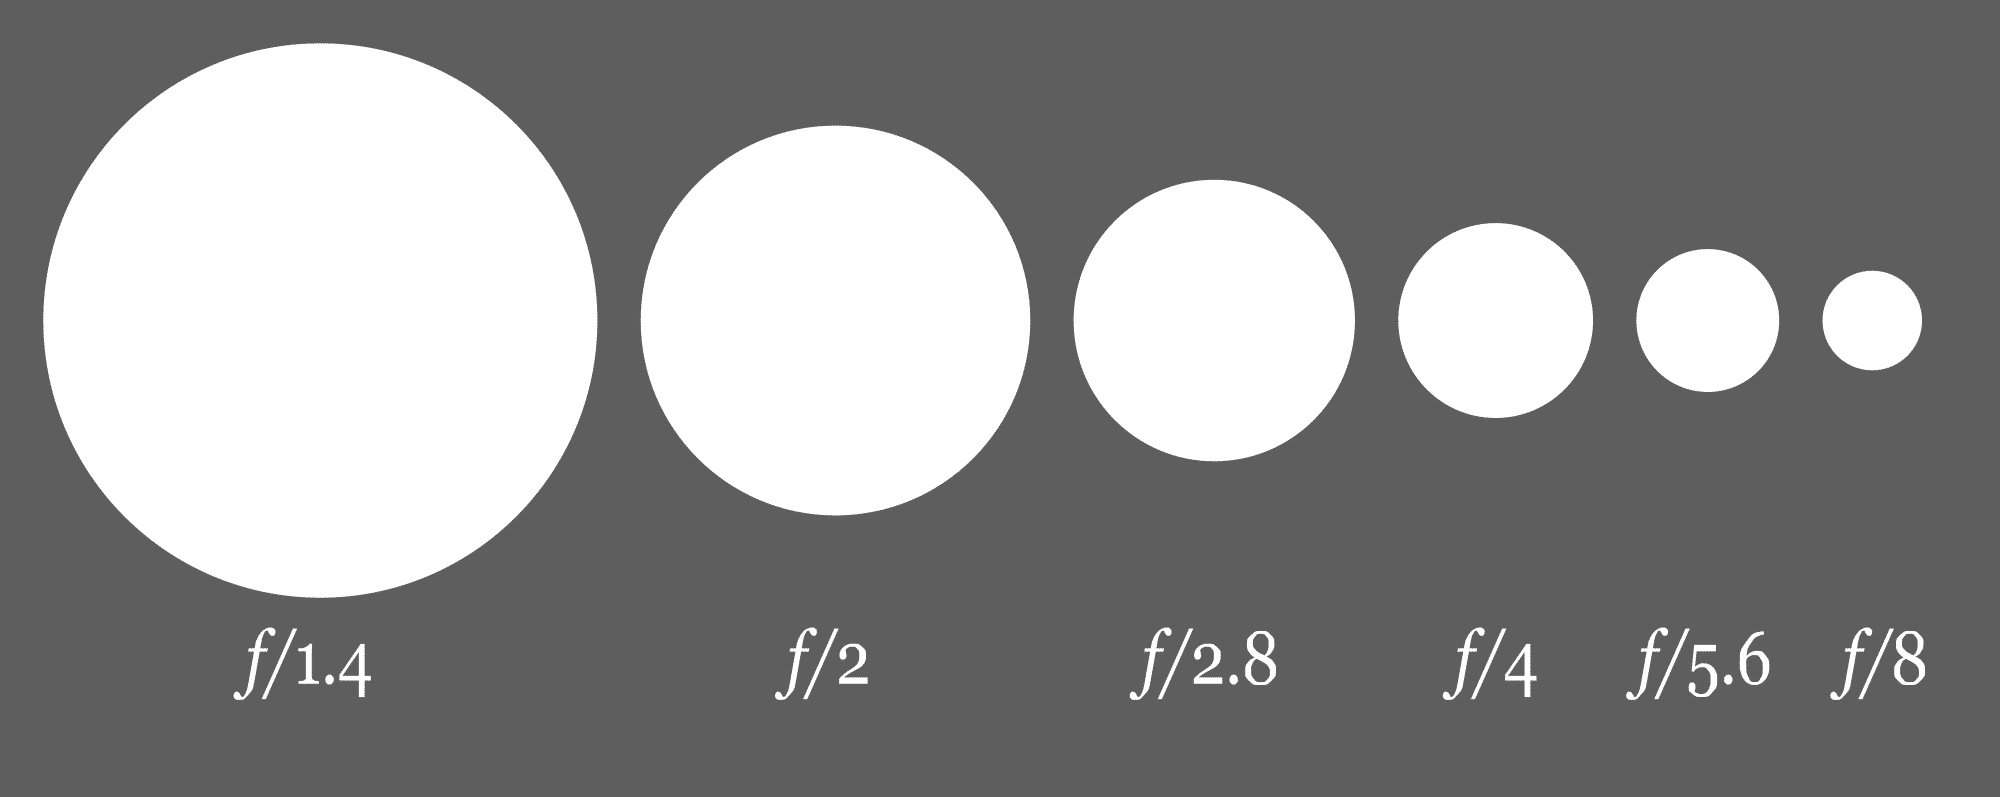
Know that each aperture corresponds to the letter "f" followed by a variable number . For example, if you tell a photographer to take a portrait at f/2.8, he will already imagine the final photo with a very blurry background and even some small probable difficulty in focusing on the whole subject if it is too close.
This is because a photographer knows the diaphragms and above all, in his path, he started from the natural diaphragms.
The letter "f" does not in any way indicate the diameter of the photo or other various amenities, but it is a mathematical formula , which is the part where I usually get lost.
To calculate everything better, it is sufficient to make f= F/D (f is equal to F over D), where f is the focal ratio, F the focal length of the lens and D the diameter of the diaphragm.
Don't worry though, now the worst is almost over, you don't have to remember this formula, I never remember it either. All you need to do is become familiar with the values of the diaphragm, which in the beginning were the " natural " ones.
When digital cameras didn't exist yet and we were "still" at the antipodes of photography, apertures were relatively few in terms of possibilities. They were physically positioned on the optics (as still happens today with Fujifilm lenses for digital cameras) and were usually divided into f/2, f/2.8, f/4, f/5.6, f/8, f/11, f/16 and f/22 . Of course, these were not the only ones to exist, as the "regular" metric scale was established in the distant Liège congress in 1905 , where it was decided that the apertures and intervals were as follows: f/1, f/1.4, f /2, f/2.8, f/4, f/5.6, f/8, f/11, f/16, f/22, f/32, f/45, f/64, f/90, f/128 and so on.
Over time things have changed considerably as, with the advent of digital photography, not only cuts but also "modifications" had to be made, thus decreasing the number of openings on one side and increasing it on the other.
Consider the fact that already closing to f/25 could be excessive and lead you to various problems , such as diffraction (to which we will return), therefore, already a value of f/22 satisfies most of the possible needs that you may have today.
The so-called "natural" values have therefore been changed, therefore, today you will not find only those but also intermediates such as f/1.2, f/1.8, f/3.2, f/7.1, f/13 and so on, but now it is right to open another speech.
The stops
After defining the numerical values that you will commonly find in photography, it's time for a pit stop. So I stop.
Seriously, to define the interval between one value and another, the term “ stop ” is commonly used, which is why it may happen that you are told to vary the opening by a single stop or by several stops.
What does it mean?
Do you remember the Liège congress of 1905 ?
Here, during that congress not only the "natural" diaphragms were established but the effective stops were also standardized, everything that was outside those values became a fraction, and therefore we had to speak of a third of a stop and so on. Don't worry, now I'll explain myself better.
In a nutshell, every position of the aperture ring (therefore every variation) is defined as a "stop" and therefore, to make an effective stop we have to rely on mathematics and fractions.
If you calculate that f/22 can be defined as effective 1/22 and f/1.4 is equal to 1/4, you can easily understand that 1/4 is higher than 1/22 and, consequently, f/1.4 is higher, as a value, than f /22 . That's why f/1.4 is a "wider" value, therefore greater, than f/22. Similarly, if you have a value of f/5.6, going down one stop means moving to f/8, while going down a third stop means moving to f/7.1.
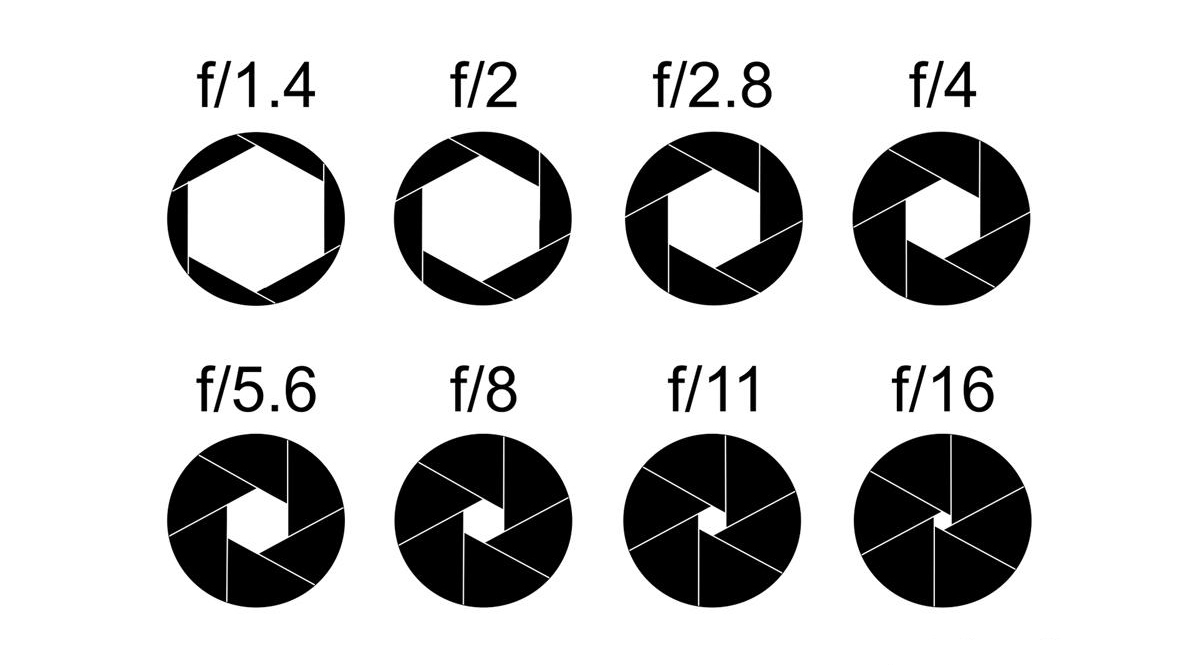
Similar to the introduction of letters into mathematics, things got a little more difficult with the introduction of half stops and third stop open/close . Basically, however, the rule remains valid as explained in the following simplified diagram created for your better understanding of all this somewhat technical pappardella that you have read so far:

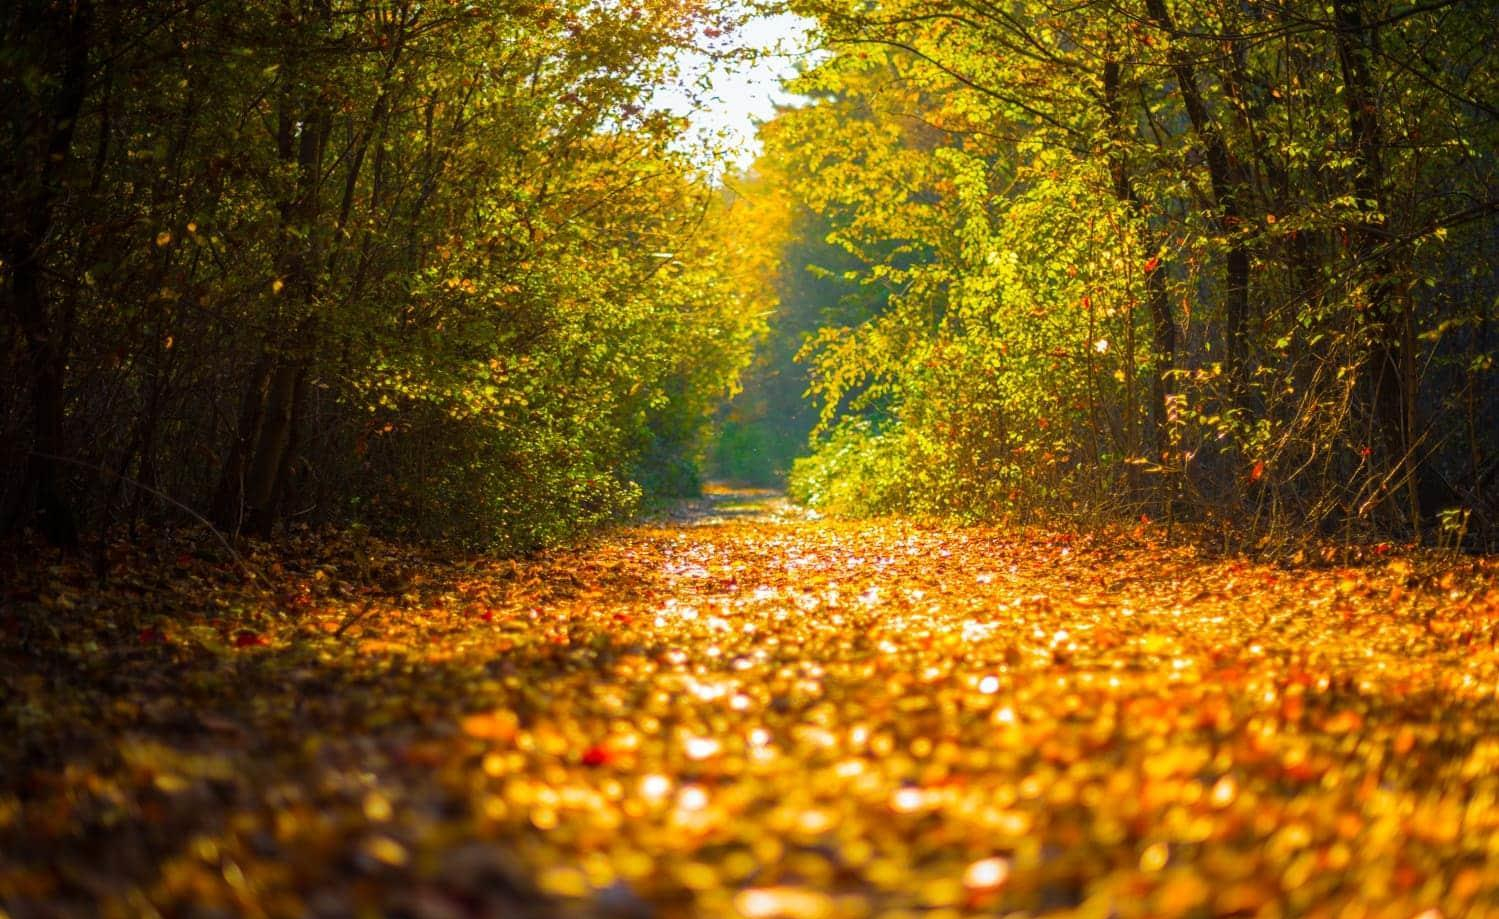
As can be seen from the diagram above, it is clear to you that if you are at f/2.8 and you have to close by one stop you will go to f/4, while if you are at f/11 and you have to open by one stop you will go to f/8 . Going from f/8 by opening a third of a stop means going to f/7.1 and so on. Bear in mind that not all digital cameras offer an extremely complete range of apertures and focal lengths, therefore an understanding of the apertures represented above will be sufficient for you to understand if your final photo will have a blurred background or a greater depth of field, if it will enter more or less light in the scene and so on. A blurred background leads, in the presence of light sources in the rear, to the famous "bokeh effect", so coveted recently on Instagram because it "is cool", but in reality it is something that has existed for years (we'll talk about it, promise) .
Each photographic lens has different apertures and, consequently, the electronic contact present on it will pass different information to the camera body , which will read them and allow you to vary them with a dedicated ring on the body itself or on the lens (as happens on Fujifilm, for example).
How to decide the incoming light
After explaining in detail what a diaphragm is and how it works, which, in summary, is a photo in the lens that allows the passage of light that projects the image onto the sensor, it is right to understand how to dose the incoming light and avoid overexposed (white/burnt) photos and underexposed (too dark) photos.
In fact, adjusting the aperture isn't anything complicated: if you want to learn in the best way, select the letter "M" in your program dial, the one that stands for "Manual Mode", and start playing with the dial that manages the diaphragms.
Depending on the camera you have, this operation could be variable: usually entry level cameras require the pressure of a button and the movement of a ring to vary the aperture, other cameras, starting from the mid-range (or semi-professional) they have a dedicated ring, usually placed on the front of the camera and can be easily used with the index finger of your right hand.
Therefore, to decide which aperture to set just turn a ring, but this is not enough to decide the entry of light through the lens.
It is necessary to know the exposure triangle well and therefore find the perfect "harmony" between exposure time, ISO sensitivity and aperture.
If you want to “think it” easy, remember that a wide aperture can help you use a faster shutter speed and lower ISO, as well as provide you with a blurrier background, while a small aperture will require slower shutter speeds and ISO taller (this rule is a maxim).
Understand the differences
One thing I always keep in mind is that to better understand something very technical you need examples, you need to give a visual image. Your eye will get used to understanding each difference better, but in the meantime, try to understand how aperture really works by focusing mainly on the background of the photographic examples below. We put a subject in the foreground so that it was easier to blur the background and thus make you understand the real differences.
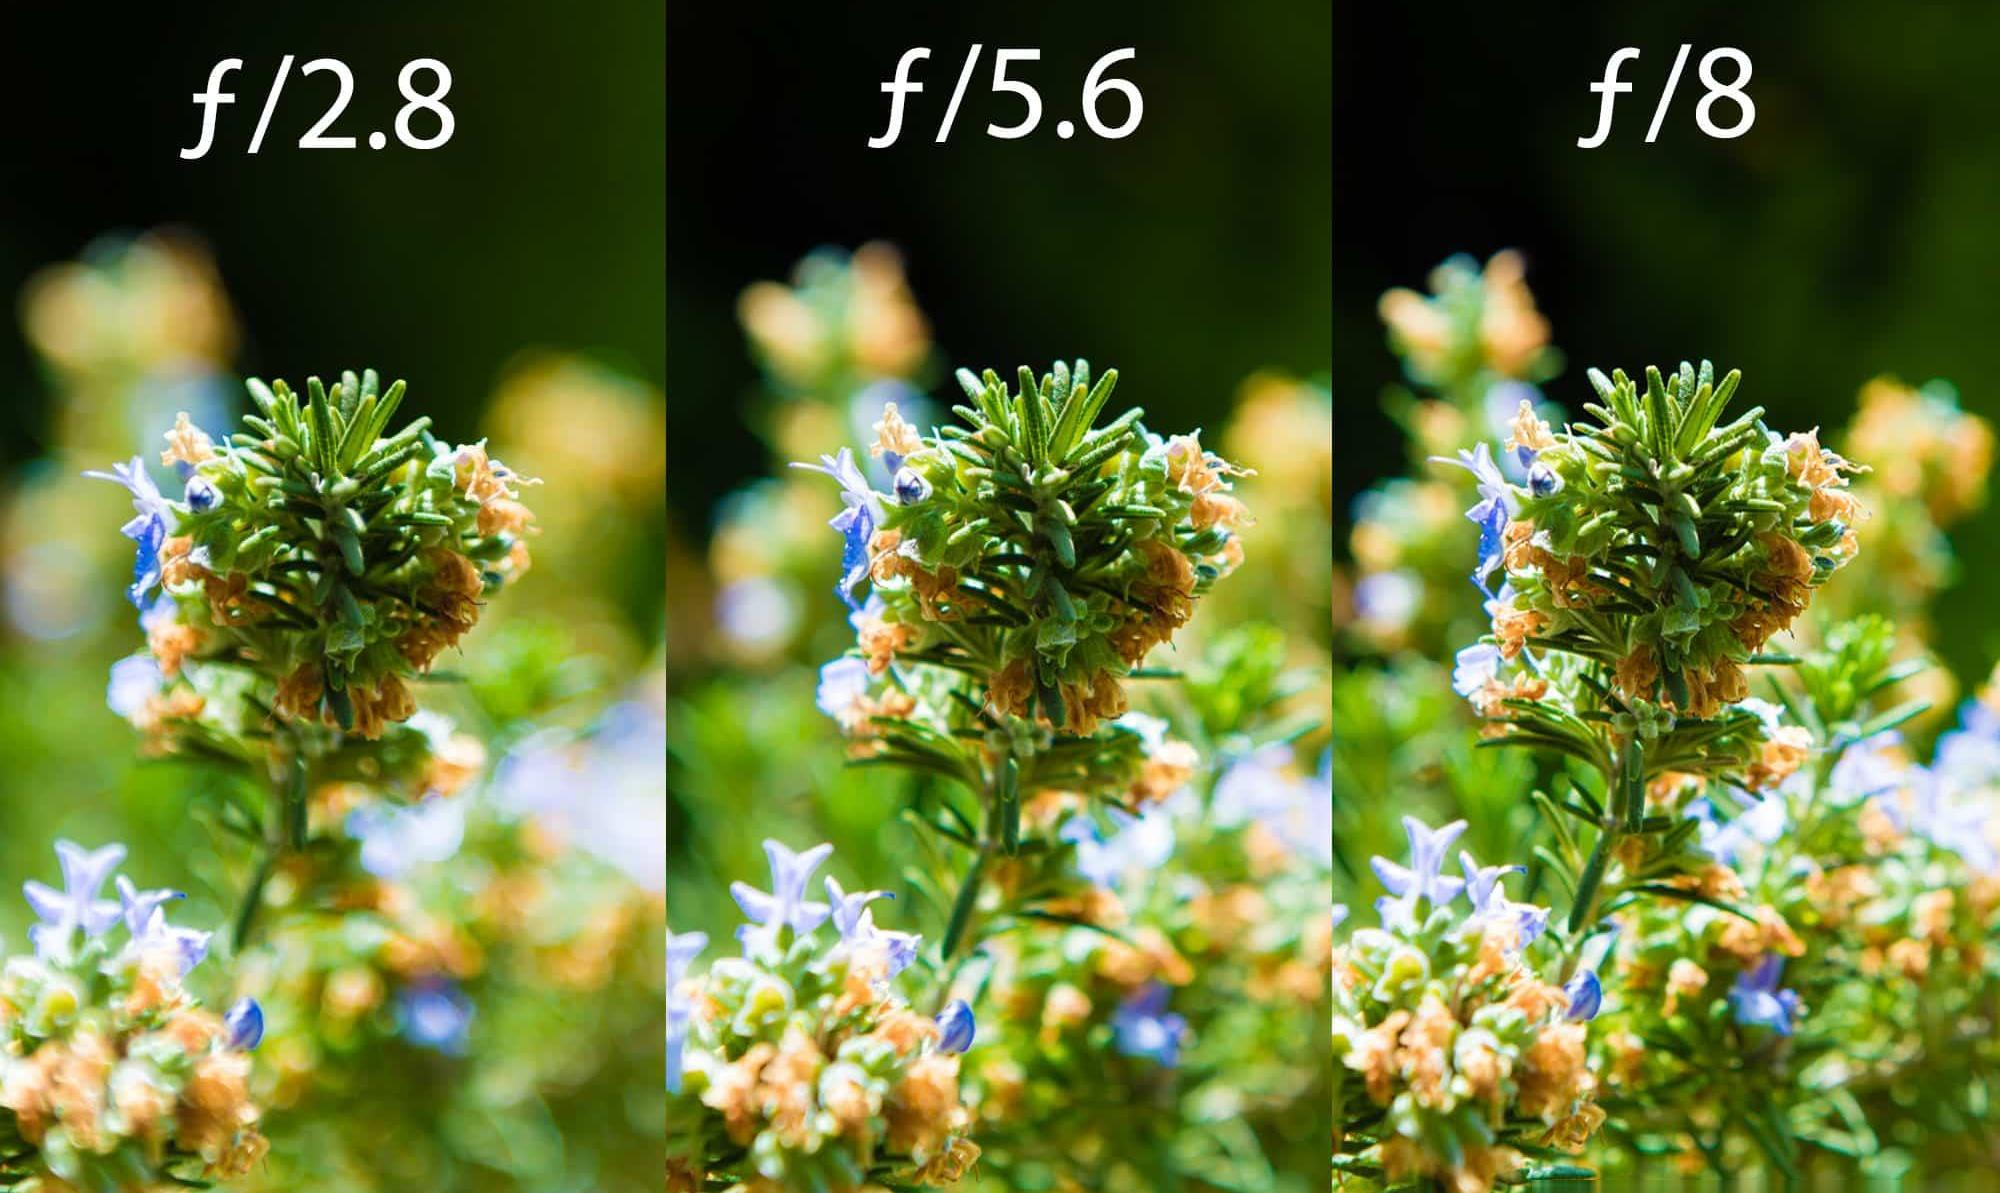
Here are the differences between the various main openings; as you can see, at ƒ/2.8 the main subject detaches completely from the background, while at ƒ/8 we find much more detail in what surrounds the subject
We've already explained it to you, but a review won't hurt : assuming you're at f /5.6, if you were asked to open one stop, you'd go to f /4; otherwise, in case you are asked to close by a stop, you will move to f /8. In this case, switching to f /6.3 would be a third of a stop, since the aperture affects not only the amount of light but also the depth of field.
The Shutter
The shutter is an electronic or mechanical device that controls how long the sensor will be exposed to light. We said earlier that the diaphragm can be compared to our iris of the eye, in this case the shutter is the eyelid!
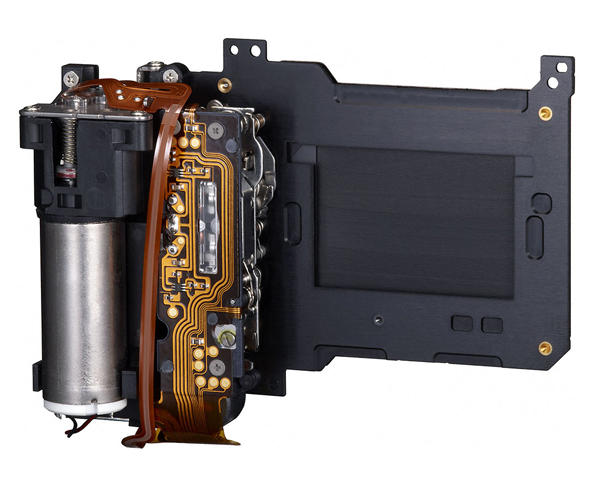
The most common shutters currently consist of a curtain with vertical scrolling which has the task of determining the shutter speed. This shutter speed is fixed in advance by the photographer and is measured in seconds or fractions of seconds.
The scale that is usually used and that you will find on your machine is this:
30” – 15” – 8” – 4” – 2” – 1” – 1/2 – 1/4 – 1/8 – 1/15 – 1/30 – 1/60 – 1/125 – 1/250 – 1/500 – 1/1000 – 1/2000 – 1/4000
…but be aware that it may vary depending on the camera model.
When the time is less than 1/125 of a second we speak of slow tempo while if we go beyond (1/500, 1/1000 sec) we speak of fast times. This is because 1/125 second was considered the time limit for shooting handheld, below this time you need to have a very steady hand or a tripod available.
Reciprocity relationship
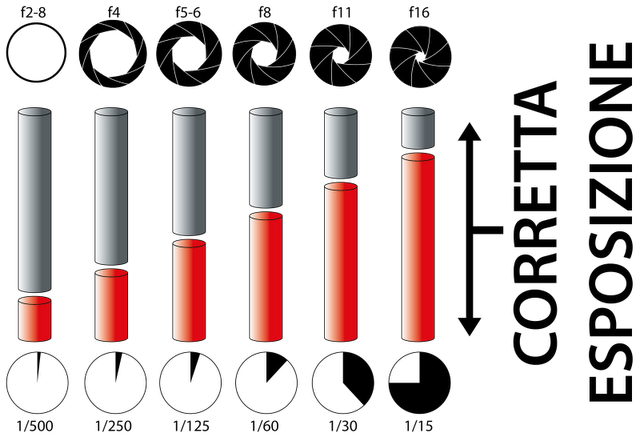
The relationship between the diaphragm and the shutter is called the “ reciprocity relationship ”. Aperture opening is inversely proportional to shutter speed (shutter).
If I halve the shutter speed I have to double the aperture, vice versa if I double the time I have to halve the aperture!
Let's take an example: our photograph is correctly exposed (right amount of light) and was taken with an aperture set to F2 for 1/125 of a second. If we wanted to obtain the same light exposure by changing, for example, the aperture to F4 (less light enters), we would have to double the exposure time which will go from 1/125 second to 1/60 (slower). (see the picture below to understand better)
An example that I often give and that you have probably already heard is that of the bathtub. Let's compare our FULL tank to our correctly exposed photograph.
We have 2 different ways to fill the tank:
- We open the tap (diaphragm) as much as possible for a very short time (shutter). In a short time the tank is full
- We open the tap very little for a very, very long time. The tub takes a long time to fill.
It's true, in the end we would have the tank full in both cases but know that they are 2 completely different ways. In the next lessons you will notice that fast times freeze the action (sports photos for example) while long times are more useful when we have very little light. You will also notice that an open aperture creates a blurry effect in the background while with a closed aperture the whole image will be in focus.
But I don't want to anticipate anything, we'll go into it later. Just know that the operation of the diaphragm and shutter are the basis of photography, their mechanism must be understood very well and you will see that it will come in handy in all your future shots.
When you subscribe to the blog, we will send you an e-mail when there are new updates on the site so you wouldn't miss them.
About the author
By accepting you will be accessing a service provided by a third-party external to https://www.insightadv.it/


Comments