
How can we deal with noise in photography?

We've all heard of noise in photography. But what exactly is it about? And how can we manage it? We answer all the questions in this article.
Managing noise: introduction
We know the role of the ISO level in photography and we know how the increase in sensor sensitivity corresponds to a parallel increase in the incidence of "noise". But what exactly is noise? It is the digital equivalent of film grain. However, while grain can improve the look and feel of an image, noise is often annoying .
Noise is not unique to digital cameras. It is a disturbance generated by all electronic instruments. The key factor is the signal-to-noise ratio (SNR). When the signal (in our case the intensity of the light captured by the sensor) is higher than the background noise generated by the electronic circuits, the image shows little interference. When the signal is weak, it is more difficult to distinguish image data from unwanted noise.
The causes of noise
There are many factors that can cause noise to proliferate. Increasing the ISO level , as mentioned, has an important impact because it amplifies both the noise and the signal. The point beyond which noise becomes excessive varies between cameras (some have better high ISO performance than others). But generally images remain clean up to ISO 800 and noise acceptable up to ISO 3,200. Above that, the margin of tolerance changes and the size and resolution of the sensor influence the result. In fact, the smaller and higher resolution the sensor, the sooner the noise becomes noticeable.
Long exposures also introduce noise, because the sensor gets hot , especially when the weather outside is hot. In general though, this type of noise is easier to remove than that associated with higher ISO levels.
Noise is more noticeable in dark areas of an image than in light ones. It's one of the reasons why it's always worth trying to expose your shot correctly, even in RAW . In fact, when we brighten an underexposed image in post-production, we also accentuate the presence of noise recorded in the shadows.

Luminance or chrominance?
“Noise”, however, is a somewhat generic term. In digital photography, noise is divided into luminance or chrominance noise. The second is the most annoying. It can cover the image with a curtain of specks, confetti and bands that obscure detail and distort the scene. Thankfully, they're also easy to remove via software without degrading the image too much.
Different speech for the noise of luminance. It's less unpleasant (more like film grain), but more difficult to remove without "softening" the image . The noise reduction system struggles to distinguish fine detail and luminance noise, and ends up smoothing out both. Via software we can at least adjust the intensity of the correction and apply it selectively to specific areas of the image.

In-camera reduction functions
However, the high ISO noise reduction offered by the camera is a less effective and versatile tool , despite the choice of several possible options. For example, you can usually choose different strengths of noise reduction at high ISO levels and even turn the feature off altogether. Since this is an internal processing setting, a bit like white balance, it is only permanently applied to JPEG files . If we shoot in RAW, however, we will have the possibility to adjust the intensity of the intervention in post-production.
Some cameras also offer a noise reduction function based on a burst of shots . If we activate it, the camera exposes a series of images with an exposure lower than that necessary for a single image and combines them to obtain a result that ensures all the detail and a reduced presence of noise. The downside is that the camera has to stay still the whole time.
The last option when shooting is long exposure noise reduction . After the main shot, the camera records a black exposure (Dark Frame), with the shutter closed, which it uses to "map" the arrangement of the burned pixels and exclude them from the final image.
This considerably reduces digital chrominance noise.
With one problem: waiting times are extended, because if, for example, you took a photo with a 4-minute exposure, the machine will need as many to create the dark frame... And so the time you spend on each shot doubles.
Origins of noise
As seen, noise affects image quality. We can do a lot in post-production, but striving to get better results in the shoot always pays off. High ISO levels and long shutter speeds are the main causes of noise , as seen below.
The noise may only be noticeable when we look at the enlarged image and not be a real problem at normal size . Also, remember that a little noise is better than a missed, blurry or useless shot!
At high ISOs
While aperture and shutter speed control the amount of light received by the sensor, the ISO level determines how much light is needed. Lower ISOs return optimal quality. But when the light is low or we can't open the aperture, raising the sensitivity becomes a necessity .
Cameras have different performance in controlling noise at high ISOs. So let's run some tests to find out how far we can push ours.
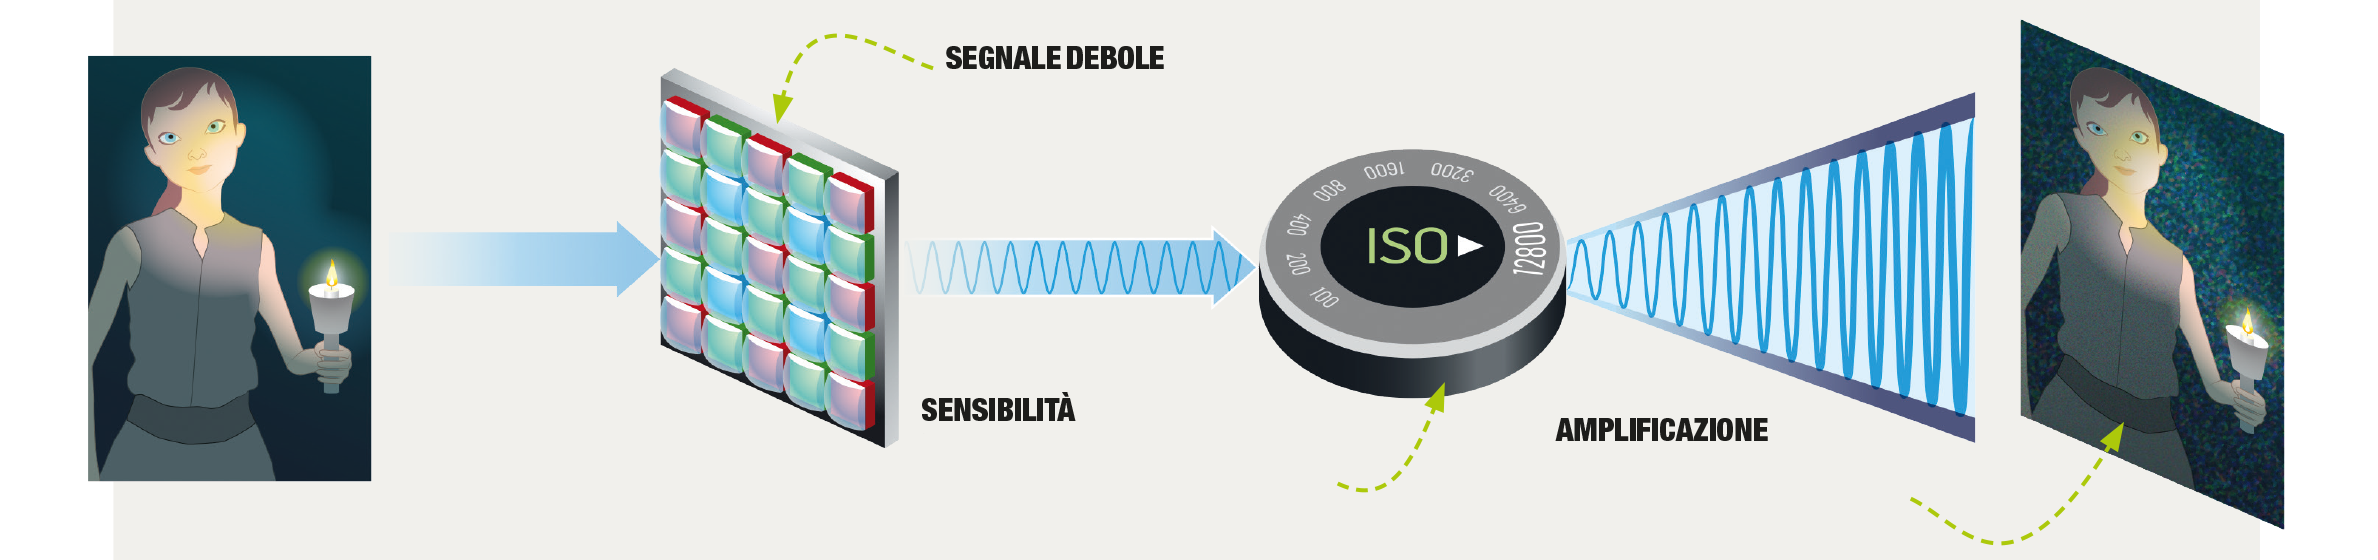
Weak signal. If the light intensity is low, raising the ISO level is an option. Sensitivity. The ISO setting determines how much the sensor signal is amplified. Amplification. With the “volume” turned up, noise is amplified along with image detail.
Noise on long exposures
Shooting in very hot places, using Live View a lot, or shooting a video before a long exposure increases the chances that the internal temperature of the camera body will rise to the point where noise develops.
We can turn on long exposure noise reduction, but this doubles the time it takes to create an image . When we shoot sequences to combine, for example when we photograph the trails of the stars, the pause can be a problem.
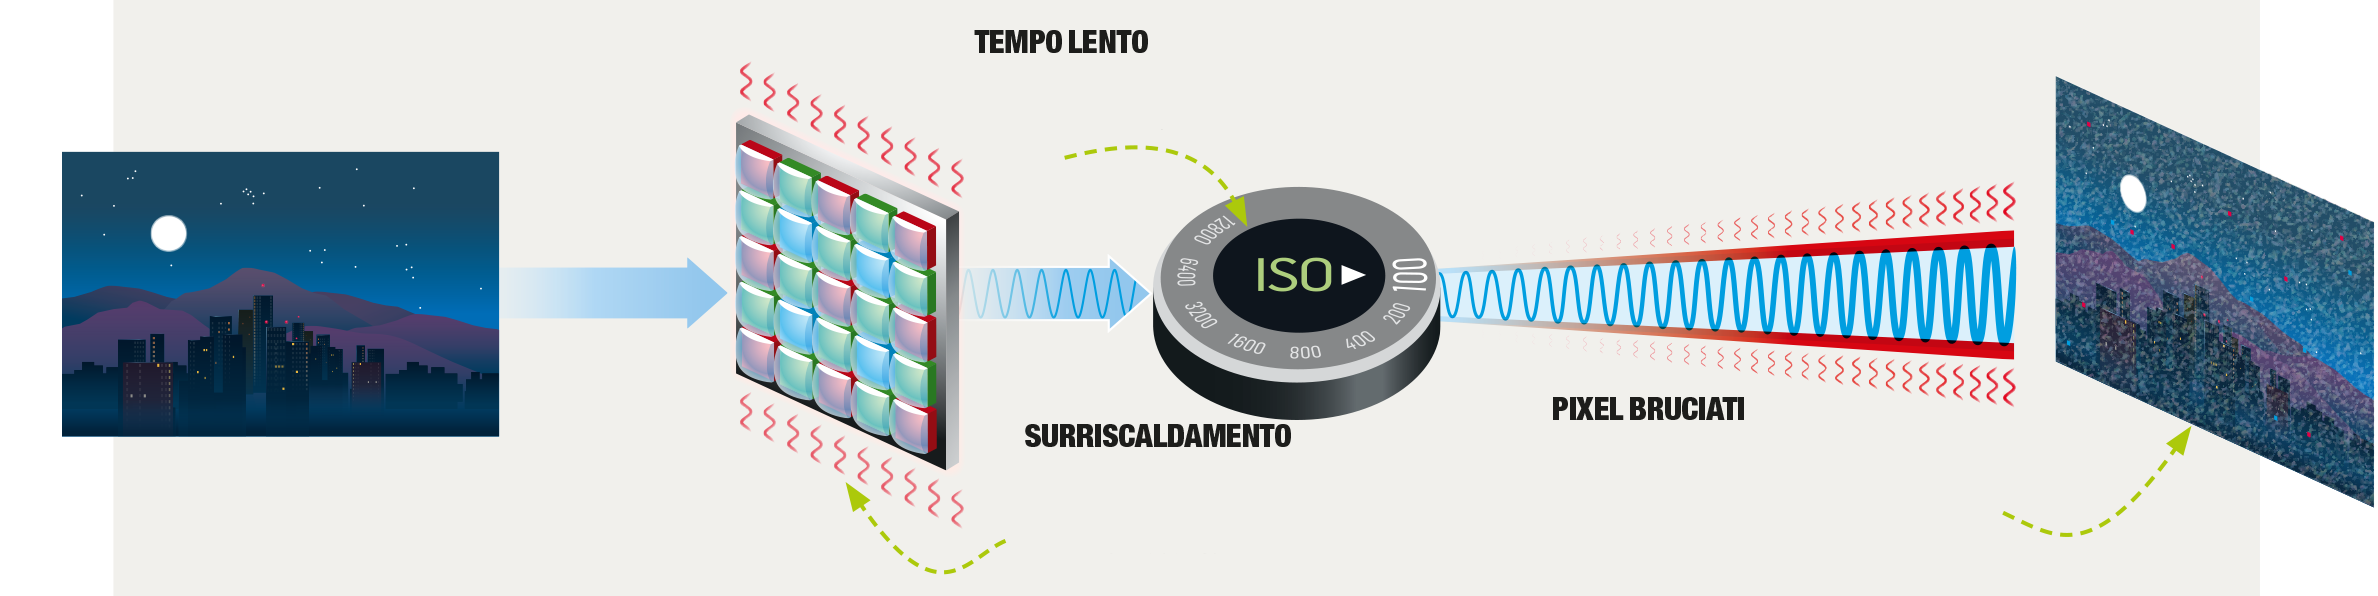
Slow time. Keeping the ISO level low forces you to lengthen the exposure. Sensitivity. The ISO setting determines how much the sensor signal is amplified. Burnt pixels. In addition to the noise, we can see “burnt” pixels in the same location in all our images.
Correct the noise
When we screw up an exposure at a shot, we know we can try to save it in post-production. It's easier to brighten an underexposed image than it is to bring detail back into an overexposed one. But every time we illuminate the shadows to reveal hidden details, we run the risk of turning up the “volume” of the noise as well .
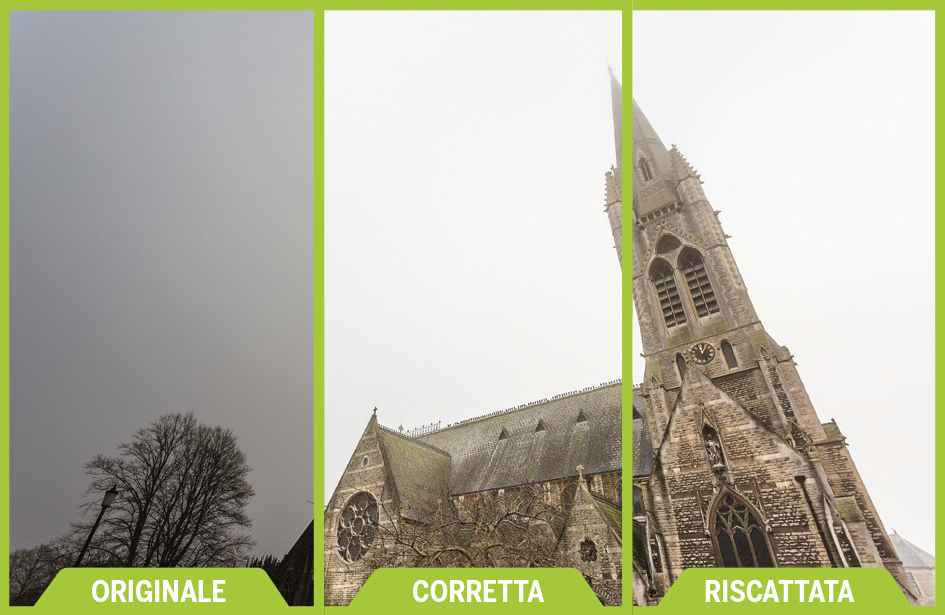
In the photo above, the clear sky caused the camera to underexpose the subject (left). The RAW format allows you to "push" the exposure (center), but the exposure corrected for the shot (right) is still cleaner.
In detail

Original (underexposed)
The clear sky corresponds to the right peak of the histogram, which however is too far from the edge of the graph to be rendered with a nice bright tone in the image.
Correct
In Lightroom, just drag the Exposure to the right to correct the brightness of the almost white sky and midtones. But the result also exhibits a curtain of noise that blurs shadow detail.
Redeemed
The second shot was made by compensating the exposure to let in more light: it is clearly seen how the greater amount of light corresponds to a lower incidence of noise.
Noise reduction
Digital cameras have specific settings to reduce noise caused by high ISO or long shutter speeds. But they don't provide the same degree of control as post-production software. Let's take a look at the sliders available in Lightroom and see what happens when we push each one to the max on a RAW file.
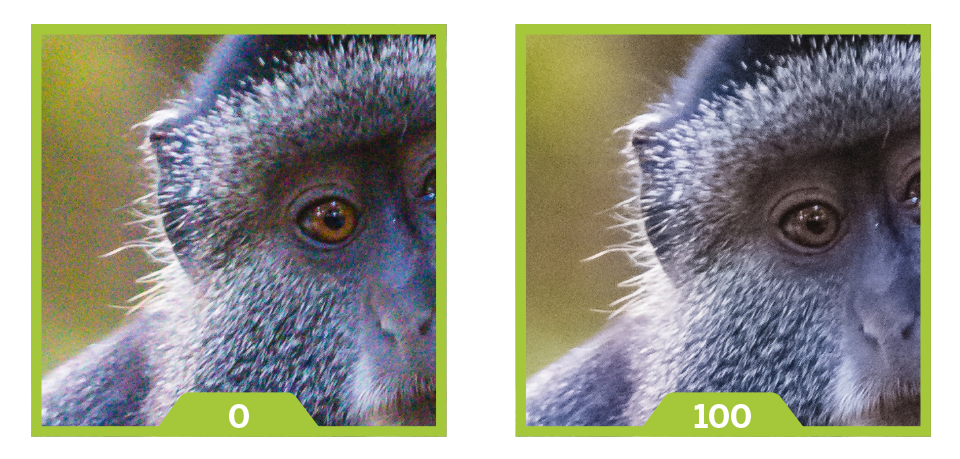
Luminance
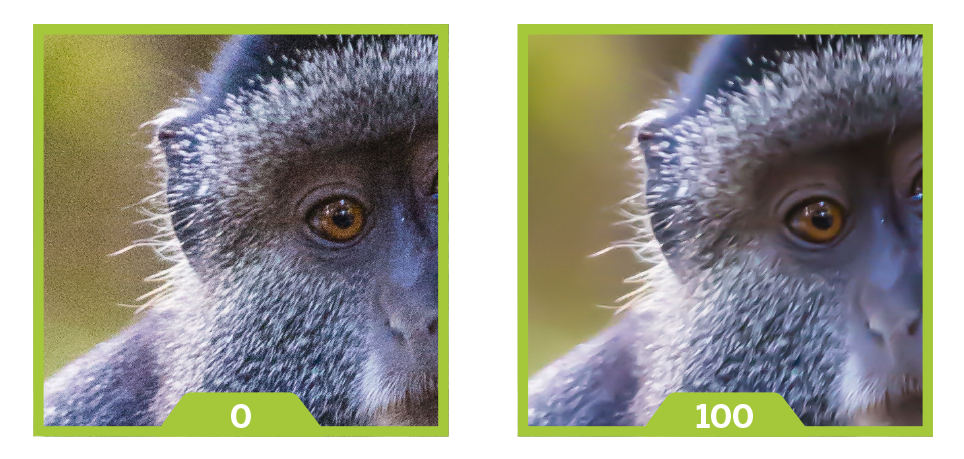
The Luminance option of the Noise Reduction function must be handled with care because otherwise we will erase the details and the “grain” of the salt and pepper tones . Let's enlarge the image to 100% to evaluate the effect.
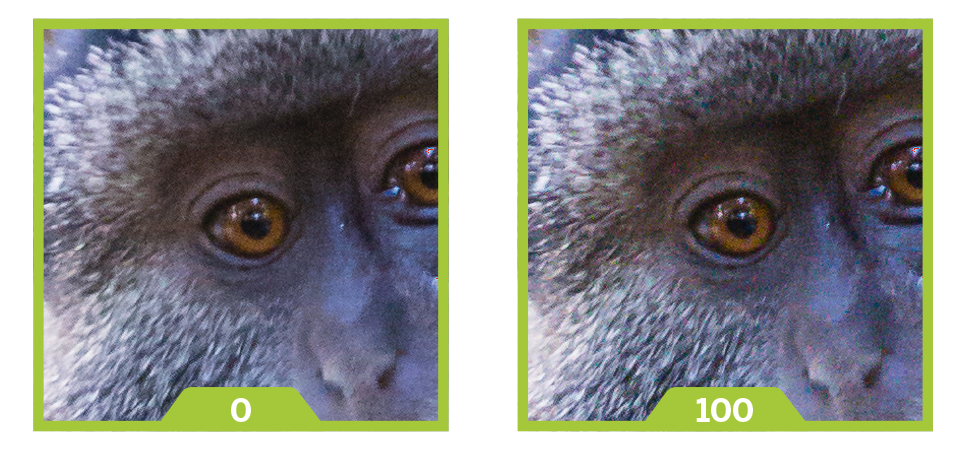
Colors
Lightroom applies an automatic color noise reduction of 25, which is usually sufficient to remove the veil of colored pixels . Higher settings tend to strip some of the color as well, as in the eye at the right.
Details
The Detail slider sets the limit of what Lightroom will identify as luminance noise. Higher settings reveal better detail (as in the eye at right) at the cost of some noise survival.
Noise Reduction: Details

Like the luminance noise slider of the same name, it defines the noise threshold. The price for better color detail is increased artifacts , as we see here in our friend's lids.
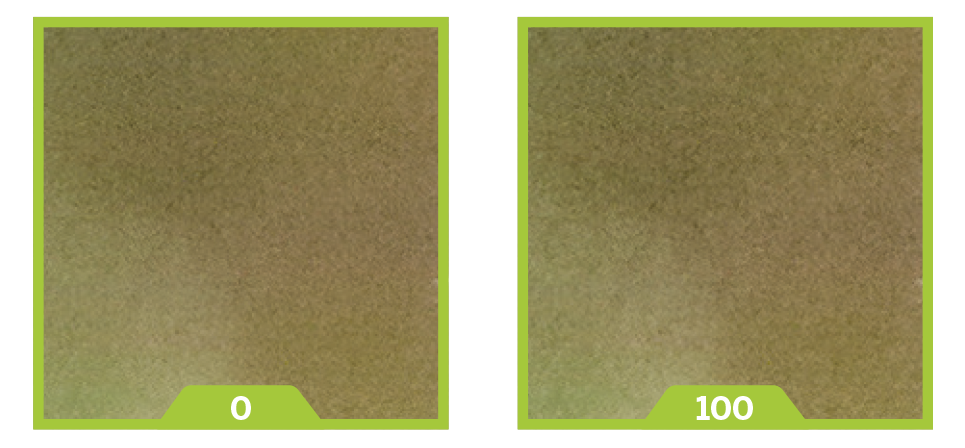
Contrast
A low Contrast gives softer results, while a higher setting adds bite . With the risk, however, of too clear-cut tonal transactions. To control the effect without the distraction of color, hold down [Alt].
Noise Reduction: Uniformity
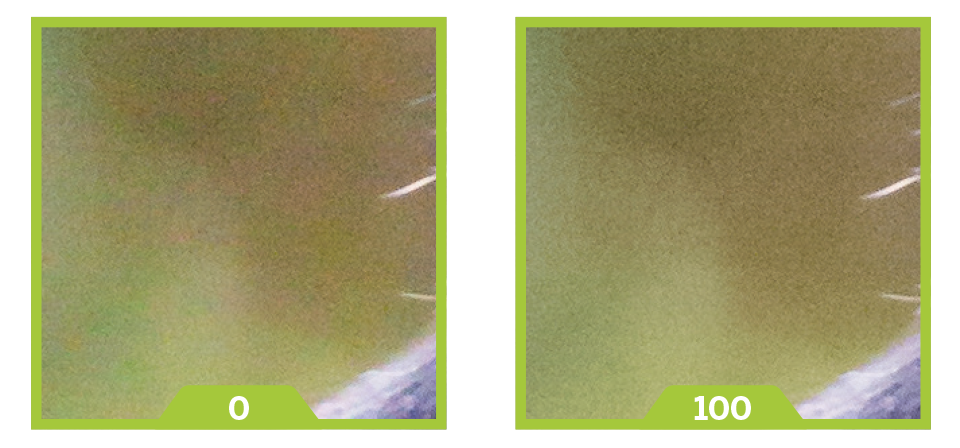
This slider reduces low frequency color. If we look closely, we see splashes of color in the image on the left. Raising the Uniformity removes them, but also dulls the overall color a bit .
When you subscribe to the blog, we will send you an e-mail when there are new updates on the site so you wouldn't miss them.
About the author
By accepting you will be accessing a service provided by a third-party external to https://www.insightadv.it/


Comments